Home >
In this article, you’ll discover how to automatically send customized welcome messages to Contacts coming from various messaging channels and assign them to relevant agents with whom they have interacted earlier.
If Contacts are reaching out to you via various messaging channels, you can respond by promptly sending tailored messages to them and guiding them to agents they have talked to previously using the Welcome Message: Channel Specific Workflow Template.
Seamlessly transition customers to agents to:
Tailored welcome messages and automated agent assignments streamline lead capturing and set the tone right from the start.
Allow customers to experience quick and efficient handling of inquiries, leading to higher satisfaction and increased customer loyalty.
To use the Welcome Message: Channel Specific workflow template, click + Add Workflow > Click Welcome Message: Channel Specific > Use Template in the Workflows module.
Trigger: The Workflow starts when a conversation is opened by the Contact.
Check Contact’s Channel: Check which channel the Contact is coming from using the Branch Step. Each channel has a separate branch. The following settings are used to create branches for various channels:
Category: Last Interacted Channel, to check what the last interacted channel was.
Operator: Is equal to.
Select: The required channel.
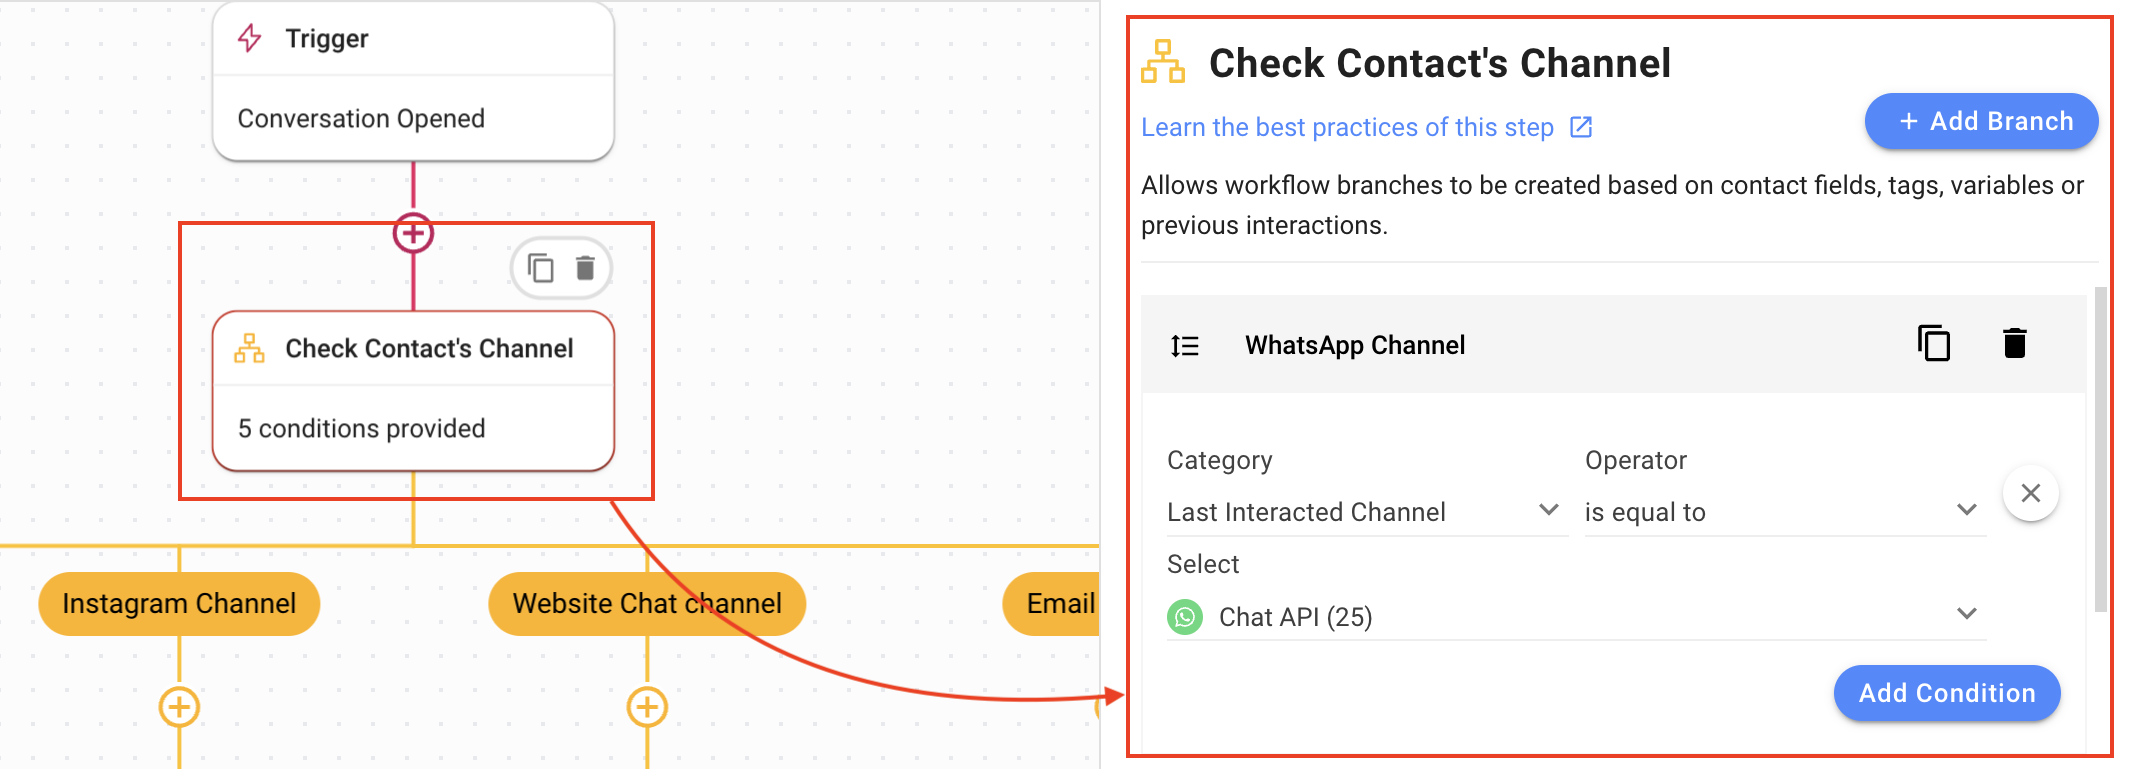
Add as many branches as needed using the Add Branch button.
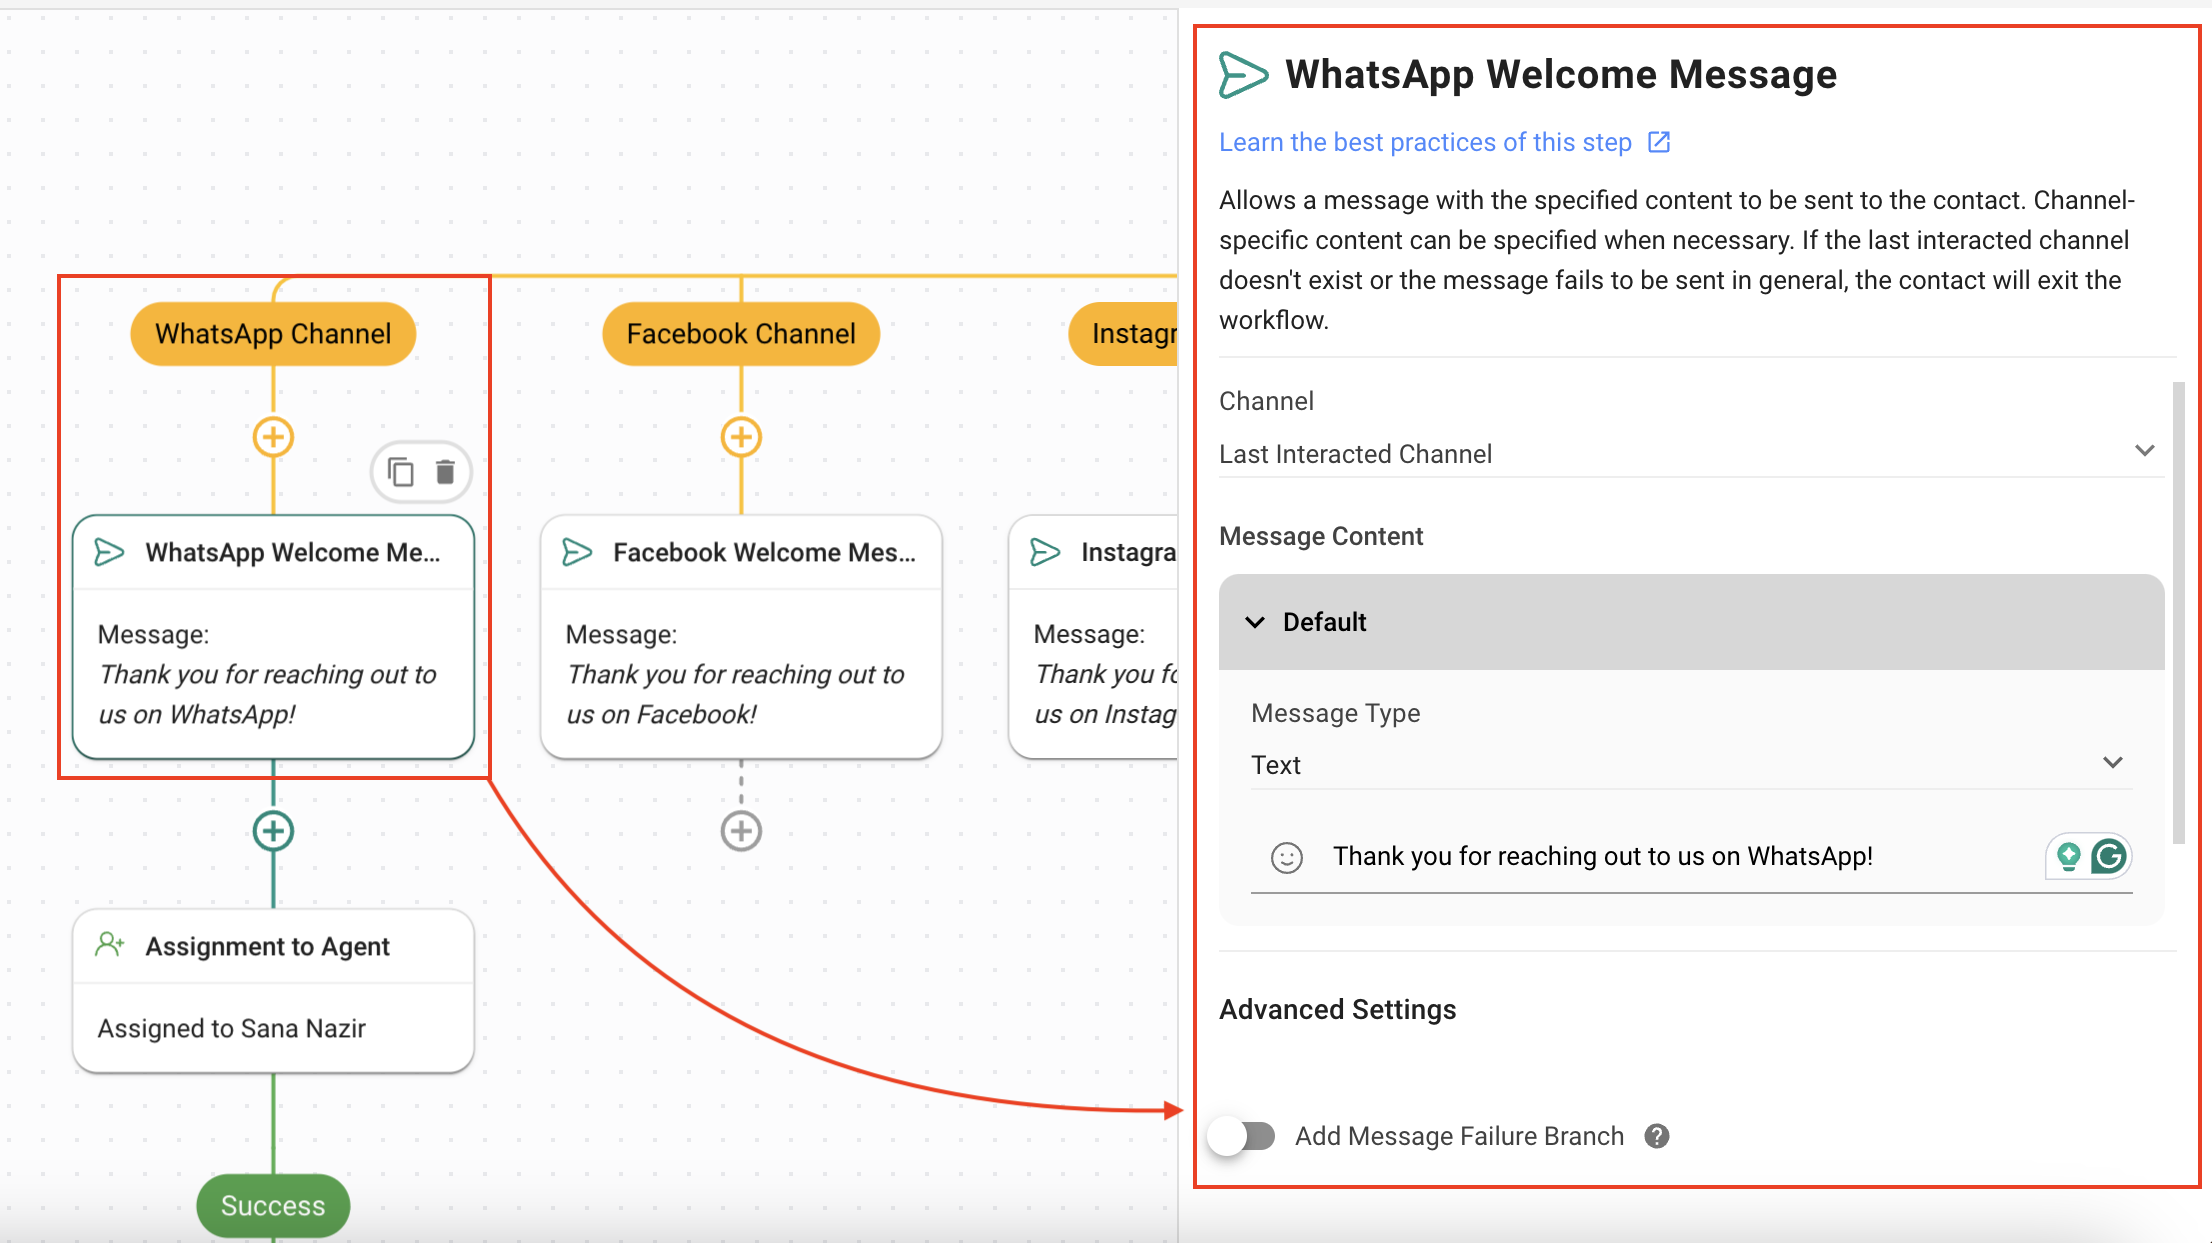
Channel Specific Welcome Message: Provide a customized greeting as a prompt response to your Contact using the Send a Message Step:
Channel = Last interacted channel, so the message is sent to the same channel the Contact is using.
Message type = Text has been set.
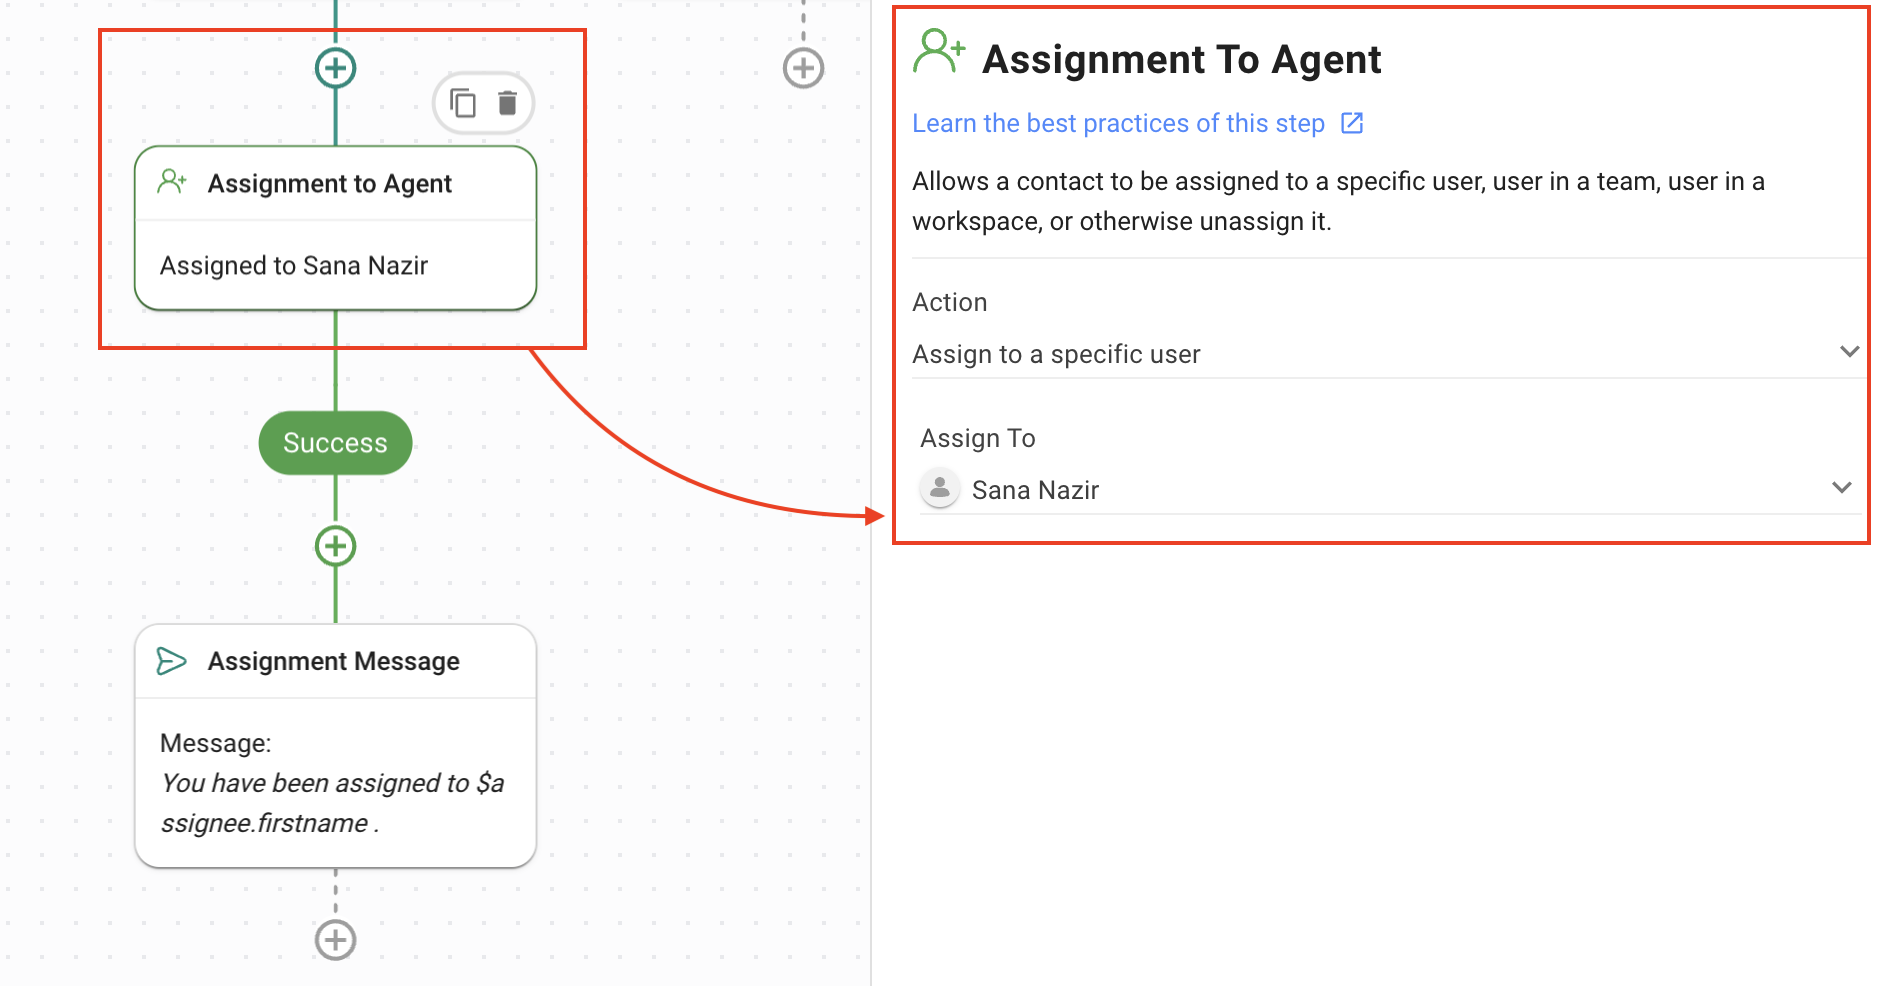
Assign to Team: Assign the Contact to an agent dedicated to the channel using the Assign to Step:
Action = Assign to a user in specific user to assign the Contact to a dedicated agent.
Assigned to = Select the relevant agent.
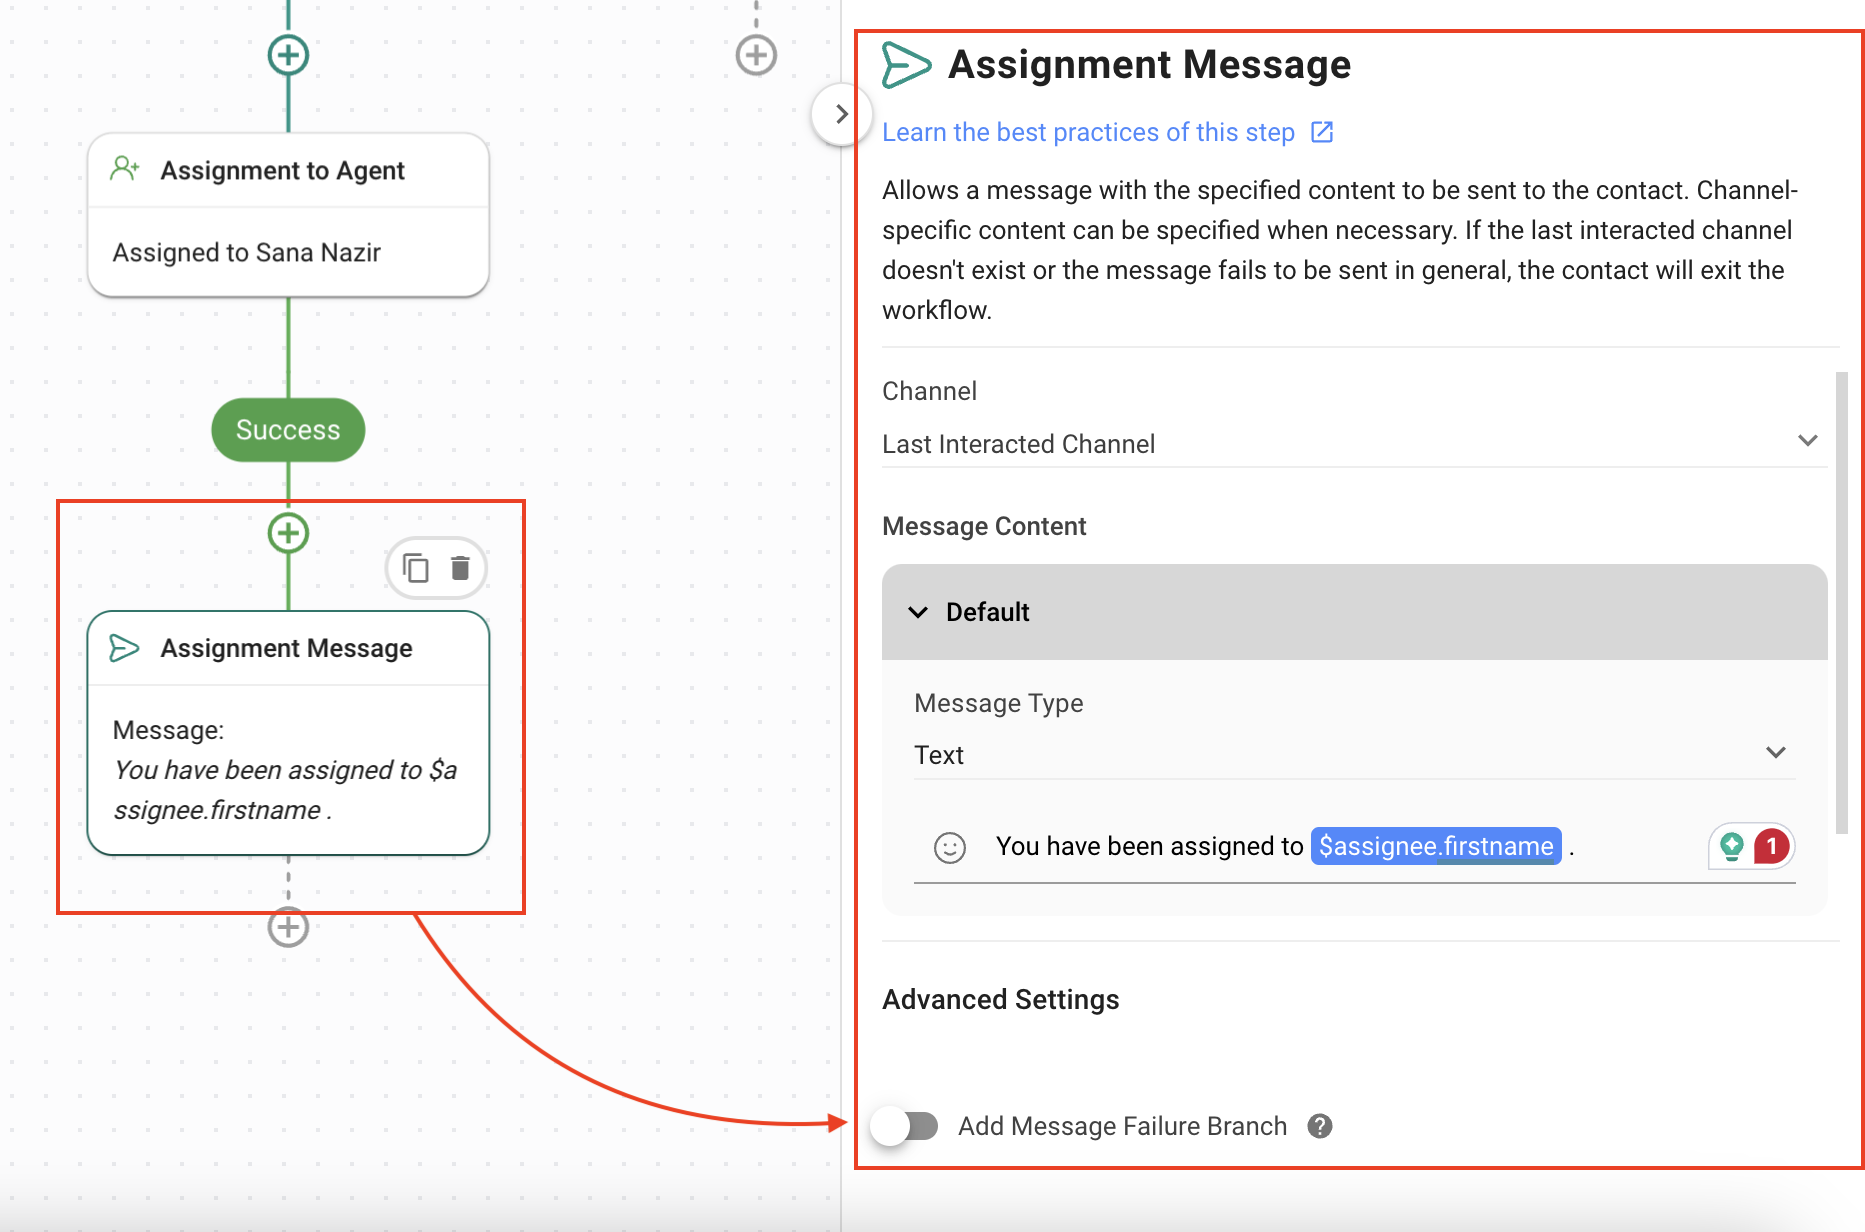
Assignment Message: Sends the Contact a message specifying the agent that has been assigned to them. To achieve this, the following values have been set in the Send a Message Step:
Channel = Last interacted channel so the message is sent to the same channel.
Message type = Text has been set.
Contacts coming from various digital channels are sent customized messages and assigned to dedicated agents.


Related articles 👩💻

